Garage doors are an essential part of any home, providing security and convenience. Whether you are replacing an old door or installing a new one, mastering the process of garage door system installation is crucial. With this step-by-step guide, homeowners can confidently tackle this project and enjoy the benefits of a properly installed garage door system.
Introduction to garage door system installation
Installing a garage door system may seem like a daunting task, but with the right knowledge and tools, it can be a straightforward process. Before diving into the installation process, it is important to familiarize yourself with the various components of a garage door system. Understanding how each part works together will make the installation process smoother.
Understanding the components of a garage door system
A garage door system consists of several key components that work together to ensure smooth and safe operation. These include the garage door itself, tracks, brackets, panels, springs, cables, and the garage door opener. Each component plays a vital role in the overall functionality and performance of the garage door system.
To ensure a successful installation, it is important to choose high-quality components that are compatible with your garage door. Consult the manufacturer’s instructions or seek professional advice to ensure you have the right components for your specific garage door system.
Preparing for installation: tools and materials needed
Before beginning the installation process, gather all the necessary tools and materials. This will save you time and frustration later on. Here are some common tools and materials you will likely need:
- Tape measure
- Level
- Screwdriver
- Hammer
- Drill
- Wrenches
- Pliers
- Garage door panels
- Garage door opener
- Garage door tracks and brackets
- Springs and cables
- Nails and screws
- Lubricant
Having these tools and materials readily available will ensure a smooth and efficient installation process.
Step 1: Measuring and preparing the garage door opening
Before installing a new garage door system, accurate measurements of the garage door opening are crucial. Use a tape measure to measure the width and height of the opening. Take note of any obstructions or irregularities that may affect the installation process.
Next, prepare the garage door opening by removing any existing hardware or debris. Ensure the opening is clean and free from any obstacles that may hinder the installation process. This step sets the foundation for a successful installation.
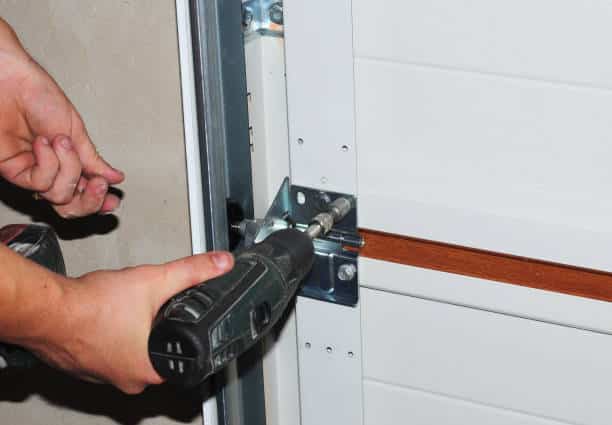
Step 2: Installing the garage door tracks and brackets
The garage door tracks and brackets are essential components that guide the movement of the door. Begin by attaching the vertical tracks to the sides of the garage door opening. Use a level to ensure the tracks are plumb and secure them with brackets and screws.
Next, install the horizontal tracks along the ceiling of the garage. Make sure the tracks are level and aligned properly. Secure the tracks with brackets and screws, ensuring they are securely fastened to provide stability to the garage door system.
Step 3: Attaching the garage door panels
With the tracks and brackets in place, it is time to attach the garage door panels. Start with the bottom panel and work your way up. Depending on the type of garage door, this may involve sliding the panel into the tracks or attaching it with hinges.
Ensure each panel is properly aligned and level before moving on to the next one. Use nails or screws to secure the panels to the track and to each other. This step requires precision and attention to detail to achieve a seamless installation.
Step 4: Installing the garage door springs and cables
Garage door springs and cables are crucial for counterbalancing the weight of the door and ensuring smooth operation. Begin by installing the torsion springs or extension springs, following the manufacturer’s instructions carefully.
Attach the cables to the springs and feed them through the designated pulleys or drums. It is crucial to install the springs and cables correctly to prevent accidents and ensure the proper functioning of the garage door system.
Step 5: Connecting the garage door opener
The garage door opener is the heart of the garage door system, providing convenient and automated operation. Start by installing the opener’s power unit in a suitable location, following the manufacturer’s instructions.
Connect the opener to the garage door using the provided hardware and ensure it is securely fastened. Follow the manufacturer’s instructions to connect the opener to the power source and program any necessary settings.
Step 6: Testing and adjusting the garage door system
Once all the components are installed, it is important to test and adjust the garage door system for optimal performance. Activate the opener and observe the movement of the door. Ensure it opens and closes smoothly and without any unusual noises or jerking motions.
If necessary, make any required adjustments to the tracks, springs, or opener settings. Test the safety features, such as the auto-reverse mechanism, to ensure they are functioning correctly. This step ensures the safety and functionality of the garage door system.

Common troubleshooting tips for garage door installation
Even with careful installation, issues may arise with the garage door system. Here are some common troubleshooting tips to address common problems:
- Check for any obstructions in the tracks or around the door.
- Lubricate the moving parts of the garage door system regularly to prevent friction and ensure smooth operation.
- Inspect and tighten any loose hardware or components.
- Test and adjust the garage door opener’s sensitivity settings to prevent unnecessary strain on the system.
- Ensure the safety features, such as photo-eye sensors, are clean and aligned properly.
By following these troubleshooting tips, homeowners can address minor issues and maintain the performance of their garage door system.
Safety precautions during garage door system installation
Safety should always be a top priority during garage door system installation. Here are some important safety precautions to keep in mind:
- Read and follow all manufacturer’s instructions and warnings.
- Use proper safety equipment, such as gloves and safety glasses, when handling heavy or sharp components.
- Ensure the garage door is properly supported during installation to prevent it from falling.
- Avoid working alone and have someone assist you during the installation process.
- Disconnect power to the garage door opener before starting any installation or maintenance tasks.
- Test the safety features of the garage door system regularly to ensure they are functioning correctly.
Following these safety precautions will help prevent accidents and ensure a safe installation process.
Conclusion: Enjoying your newly installed garage door system
Mastering garage door system installation is a valuable skill for homeowners. By following this step-by-step guide, homeowners can confidently install or replace their garage door system. Remember to consult the manufacturer’s instructions and seek professional advice if needed.
Once the installation is complete, take the time to enjoy the benefits of your newly installed garage door system. Improved security, convenience, and curb appeal are just some of the advantages you will experience. With proper maintenance and care, your garage door system will provide years of reliable service.
For professional garage door services in Rockwall, TX or to learn more about garage door system installation, contact BH Door and Gates. Our team of experts can provide guidance, products, and services to ensure a successful garage door installation. Take the first step towards a functional and aesthetically pleasing garage door system today.